The TPM (Trusted Platform Module) is a chip that is soldered or attached to the motherboard which stores personal data. So, when we get the error message “TPM device not detected“, the system cannot detect this chip during boot.
We can either press Continue, open BIOS setup, or Diagnostic. Although we can click on Continue and boot the system normally, we cannot enable Bitlocker anymore. Since all Bitlocker’s passwords and encryption are saved in the TPM chip, we cannot access them if the system cannot detect this chip.
Another problem we face when the system does not detect TPM devices is users cannot upgrade their system to Windows 11.
What Causes TPM Device not Detected Error?
-Outdated BIOS
-TPM chip damaged
-Network connection issues
- -Problem with TPM keys
How to Fix TPM Device not Detected Error?
Therefore, this issue needs to be resolved if you want to upgrade to Windows 11.
Here are some solutions you can try if the system cannot detect Trusted Platform Module.
Remove the Power Supply
Sometimes, there may be a power usage issue that can cause the Trusted Platform Module to malfunction due to unknown reasons. A simple restart may solve this issue, but there is always some charge left in the motherboard capacitor, resulting in the same problem even after a restart.
So, it is ideal to remove the power source completely and discharge all the capacitors. Once you remove the power supply from the wall outlet, press the Power button five to six times to discharge the capacitors.
If you are on a laptop, we recommend removing the battery and pressing the power button multiple times to discharge its capacitors.
Once you complete the process, plug the computer back in and turn it on. The system should detect the TPM chip. If not, our solutions mentioned below may work for you.
Enable TPM
You can follow these steps to Enable TPM.
1-Enter your motherboard’s BIOS by pressing Delt, F2, or F9 during startup, depending on the manufacturer.
2-Look for the option named Security.
3-Then, locate TPM, Intel Platform Trust Technology (IPTT), or AMD CPU fTPM. Enable TPM visibility. This step may be different as there may be a checkbox or a toggle bar to enable or disable the TPM utility
4-Now, select Save and exit.
Once the computer starts, the system should detect the TPM chip. Try other solutions mentioned below if the TPM setting is not seen in the BIOS.
Reset BIOS
Here are a few ways you can reset BIOS.
- 1-Reset option in BIOS itself.
- 2-Remove the CMOS
- 3-Reset using a jumper
Update TPM Driver
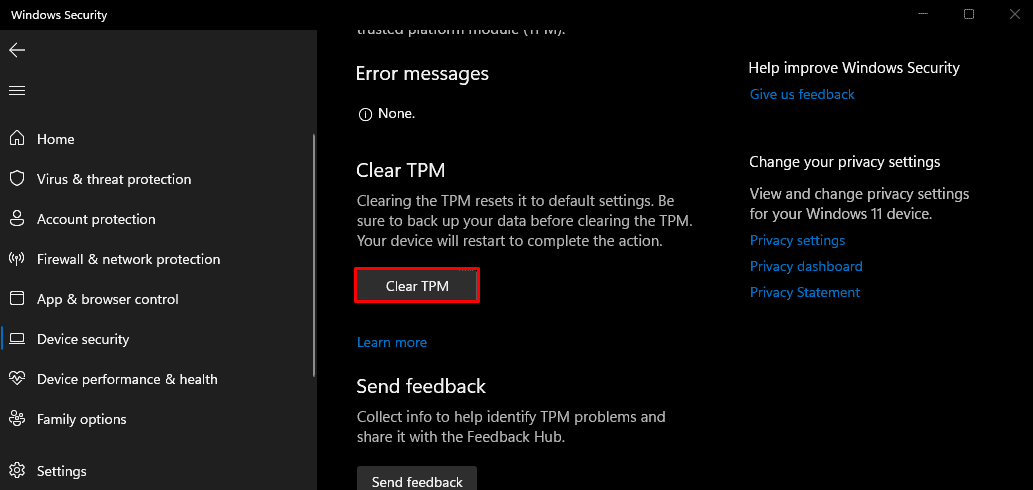
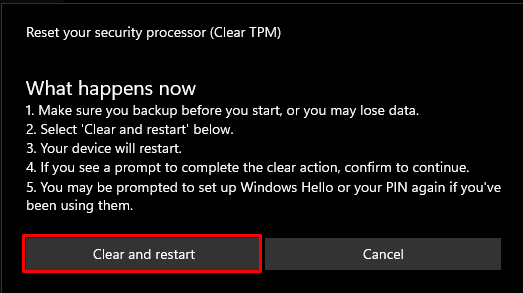
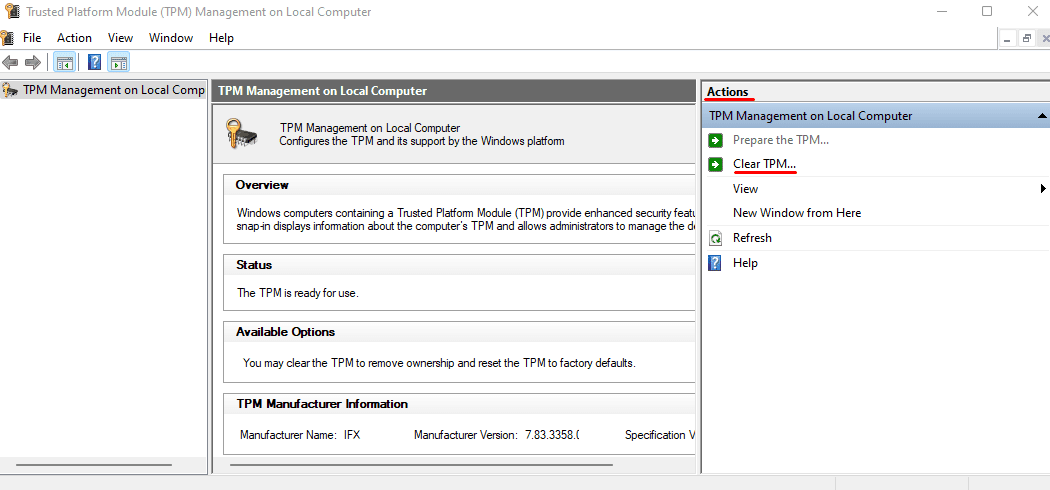
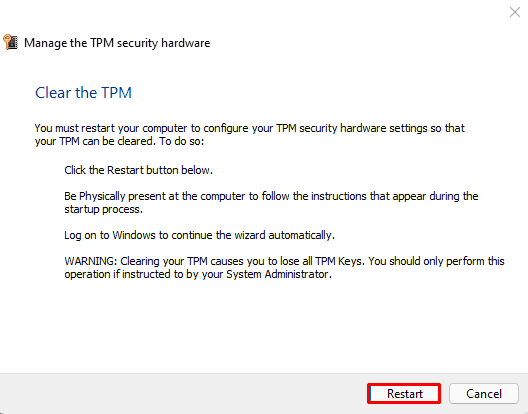
We can use the Windows Defender Security Center utility to clear the TPM values as a final solution before replacing the TPM chip itself. Clearing the TPM values will erase all information inside the TPM chip, reset it to the default state, and delete data protected by those keys.
You can follow these steps to clear the TPM.
1-Press the Windows key + I.
2-Go to Privacy & security > Windows security > Open Windows Security.

3-Once the Windows Security dialog box opens, click on Device security.
4-Under Security processor, click on Security processor details.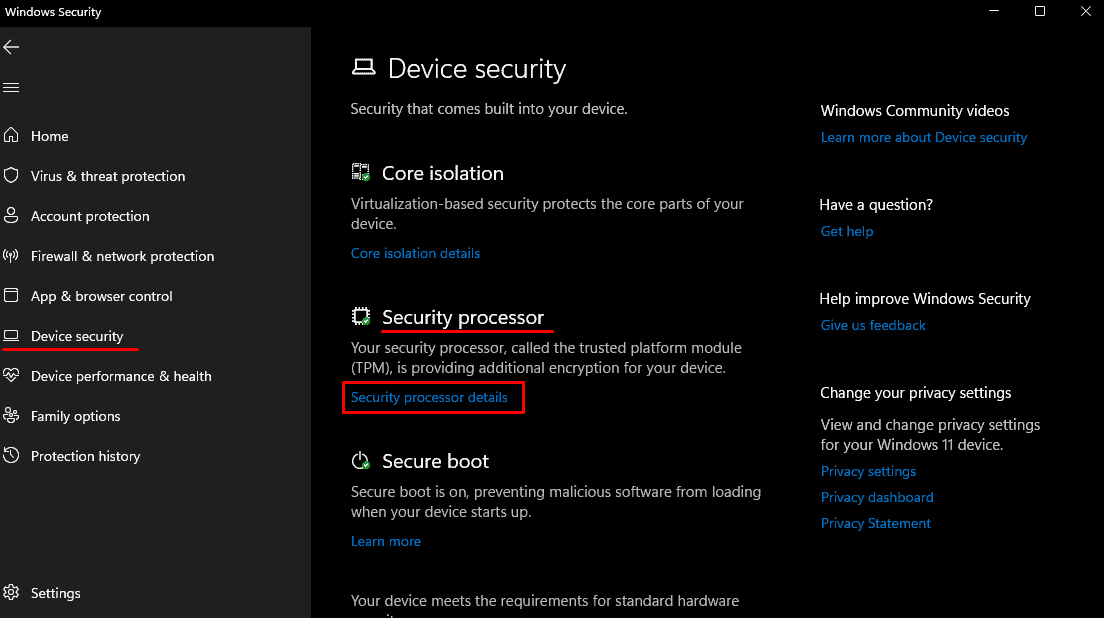
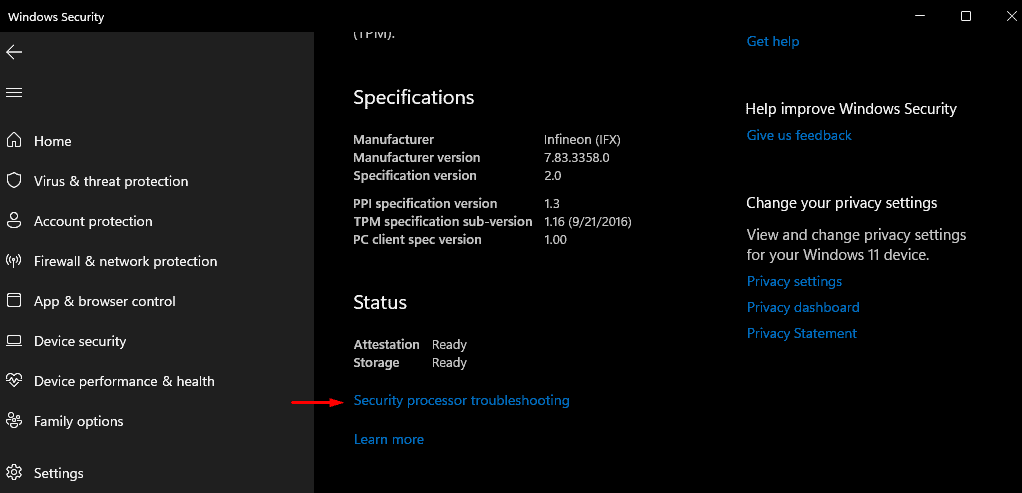
5-Click on Security processor troubleshooting.


No comments:
Post a Comment